How to Save Your Bouquet After the Big Day
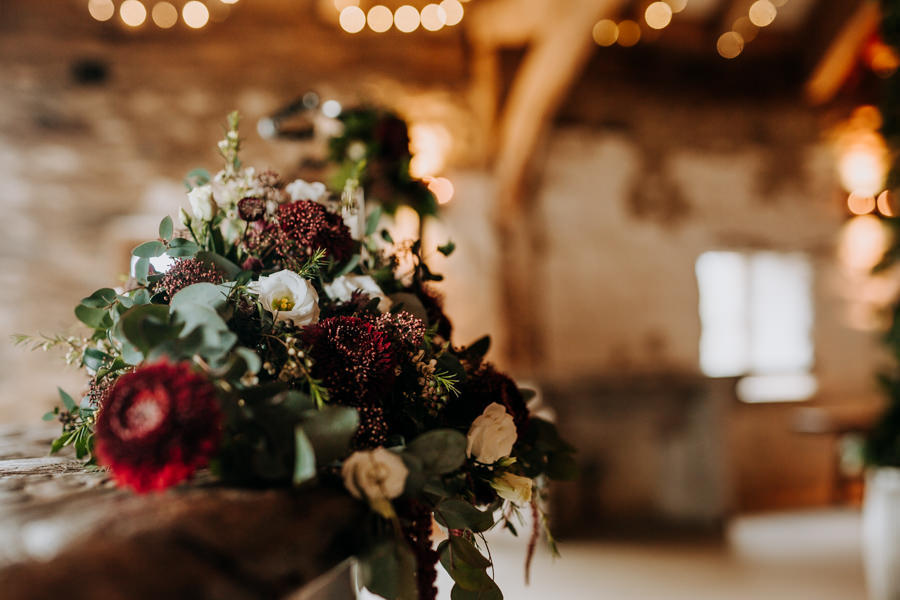
Header image credit M and G Wedding Photography, full feature here
Did you know we have 3,000 blog posts on English Wedding? All of the real weddings we’ve featured over the last few years, all the advice we’ve shared and styled photoshoots our members and friends have created – it really adds up! I’d like to say a huge thank you to everyone who’s been featured on the website over recent years and months – and we’re looking forward to the next 3,000 blog posts!
Today we’re sharing a few ways you can save your wedding bouquet as a keepsake to remember your day. I totally recommend working with resin (lots of fun, also sciencey!) but the other methods are lovely crafty projects to try as well. Do have a go with other flowers before you try this on your actual wedding bouquet though!
Thanks to lovely Hayley for sending this article our way.
In addition to photos and videos, one way to save a little piece of magic from your big day is to preserve your wedding bouquet. Your wedding bouquet embodies the colours and themes of your wedding and can be a great way to keep a snapshot of the day. There are dozens of ways to preserve your wedding bouquet so try several methods in advance and choose which one you like best. To help you get started we highlighted three of our favourite methods below.
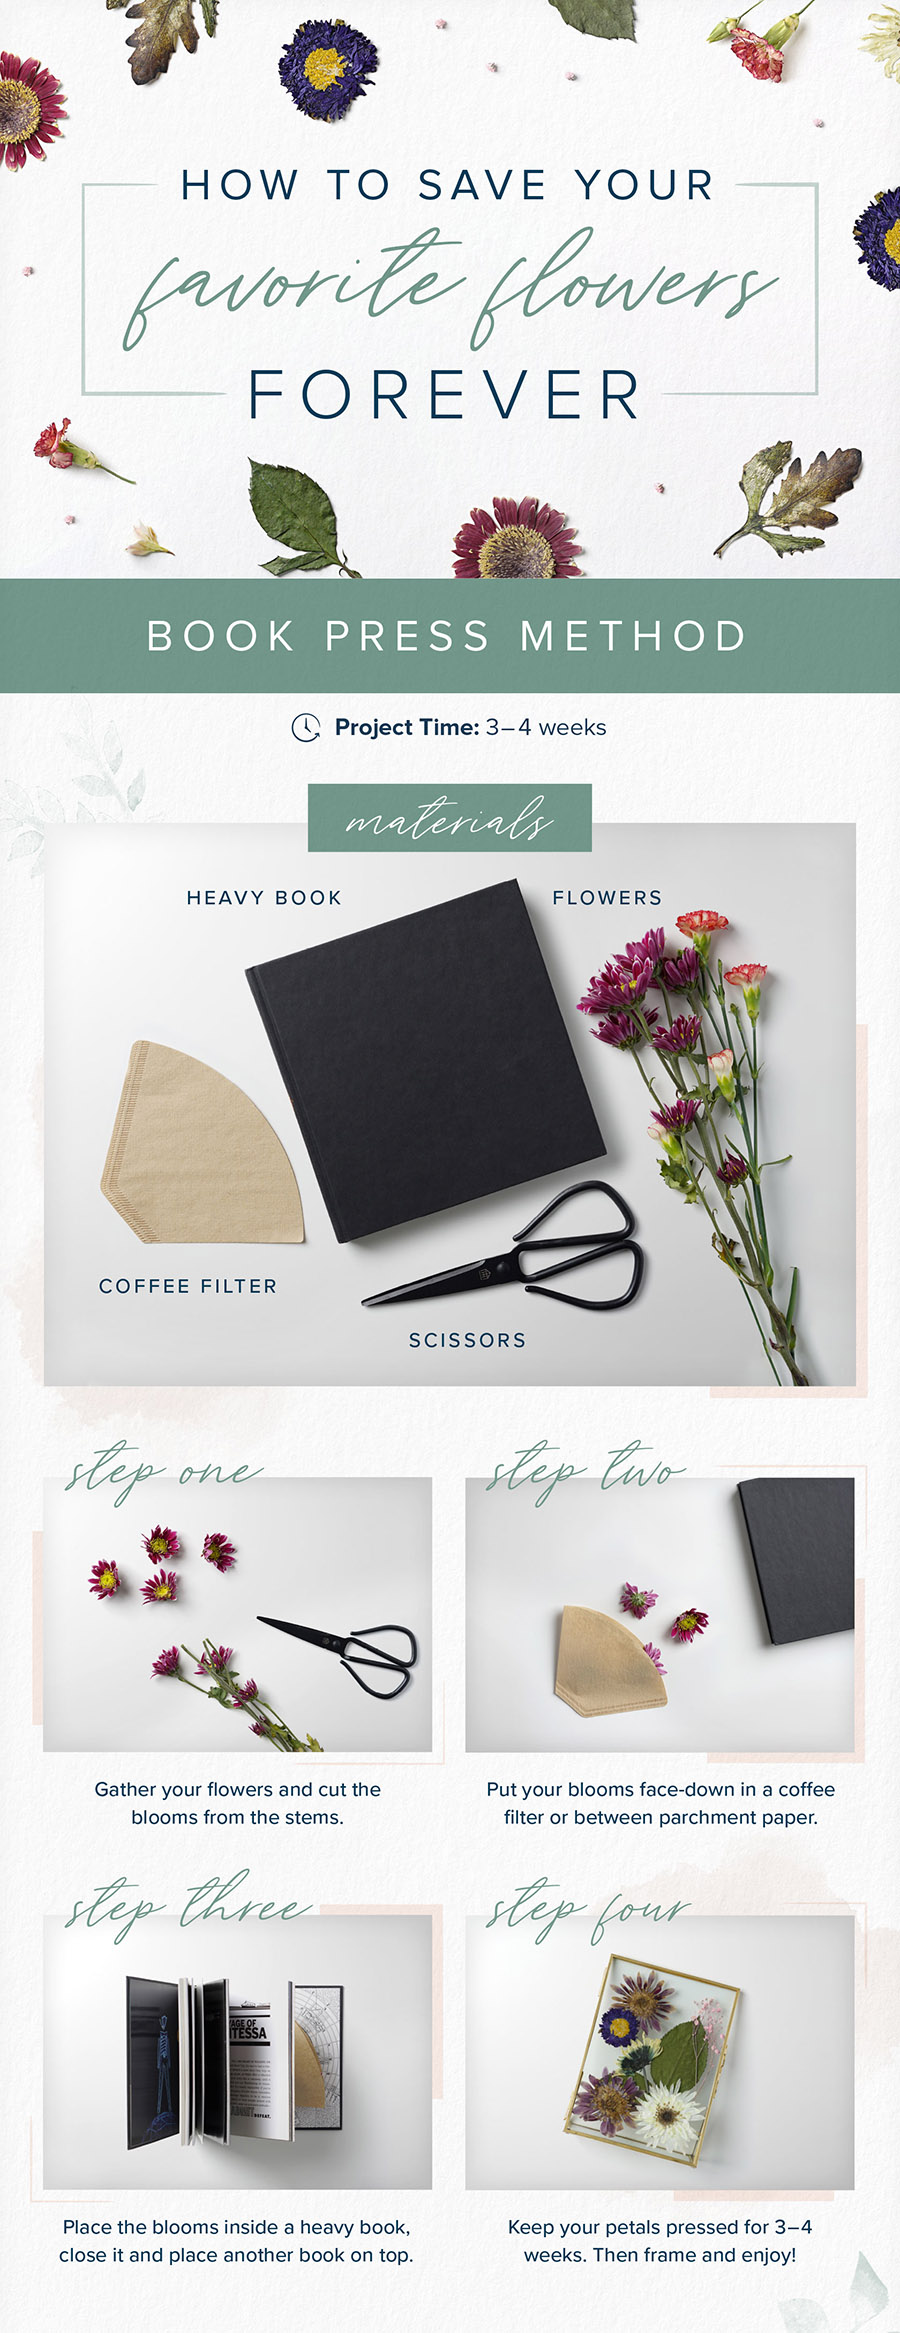
Book Press Method
Pressing flowers is one of the easiest ways to save your blooms from your big day. All you need are some heavy books, coffee filters, and a few weeks. If you want to frame or mount your flowers and put them on display, this is the best method for you. However, the pressing method can cause blooms to lose colour and can diminish the beauty of certain flowers that have high moisture. For those flowers, other methods may be a better choice.
 With thanks to zola.com
Materials needed:
Flowers
2 Heavy books
Coffee filter
Instructions:
Choose your favourite blooms from your bouquet and trim the stems and any unwanted leaves.
If you have thick flowers like roses, it can be helpful to cut the flower in half to make pressing easier.
Lay your flowers inside the coffee filter, ensuring that they don’t touch.
Open one book to a middle page, place the coffee filters inside, and close the book.
Stack an additional heavy book on top to encourage pressing and leave for 3 or more weeks.
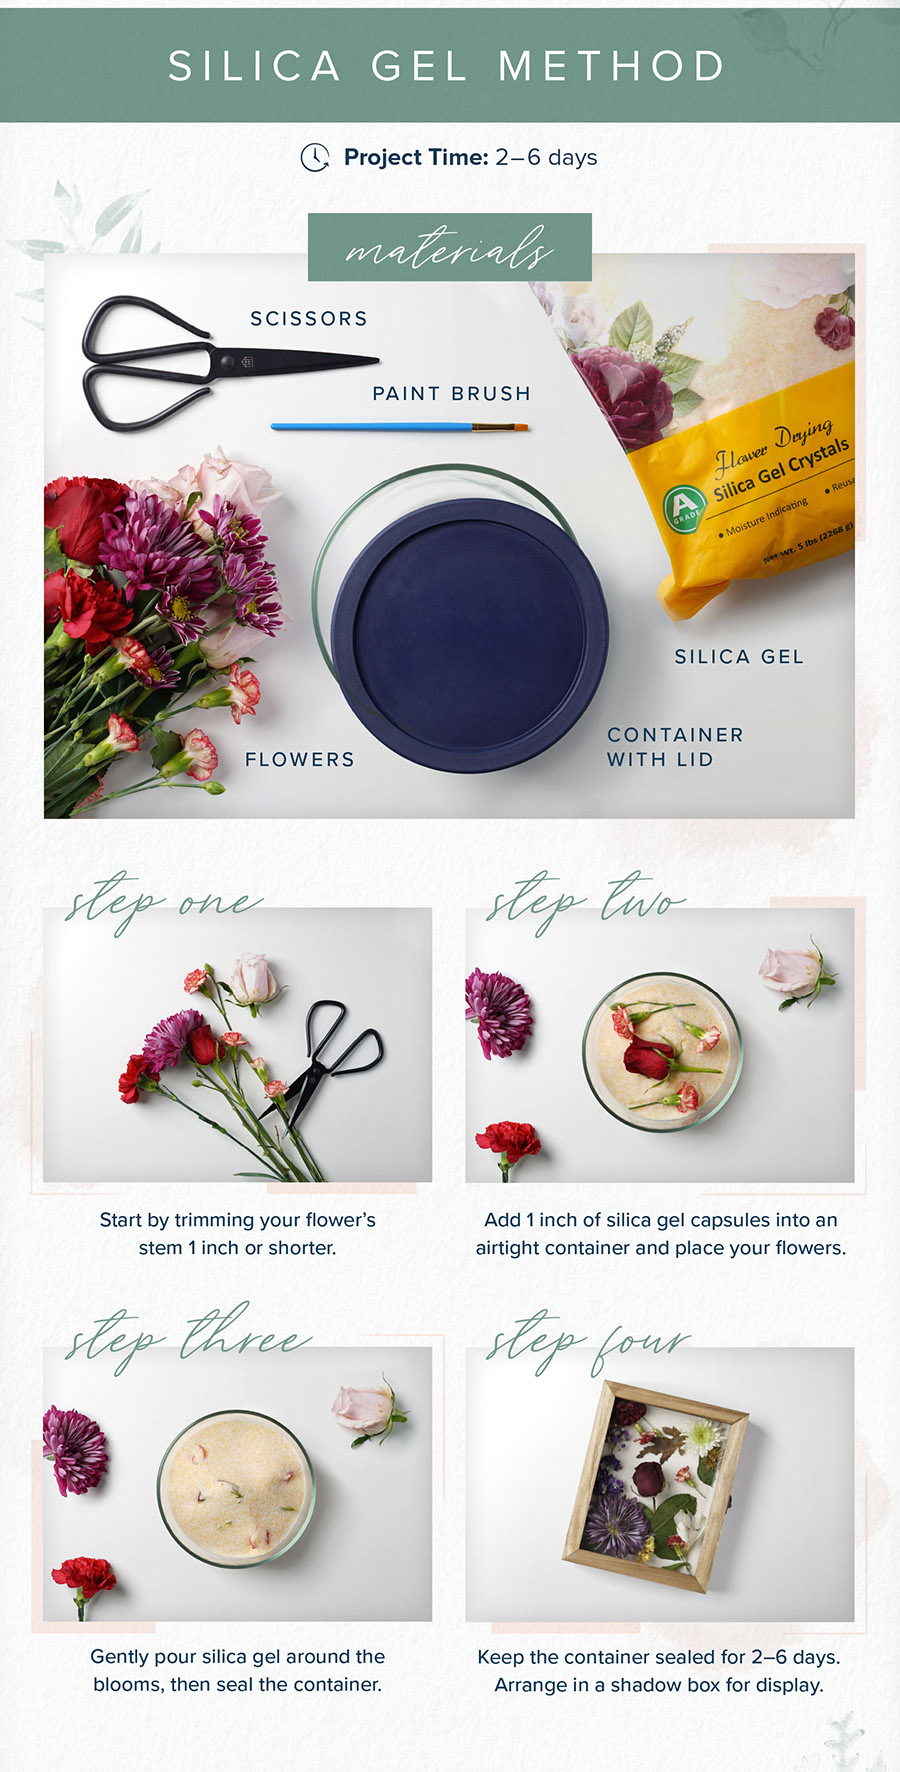
Silica Gel Method
If you want to display your bouquet in a vase or shadow box, silica gel is the answer. This method quickly dries out blooms to stop deterioration. In less than a week this method can give you a completely preserved bouquet that retains most of the colour.
Silica Gel Method Video
 Credit zola.com
Materials needed:
Flowers
Silica gel
Airtight container
Scissors
Paintbrush
Hairspray
Instructions:
Choose which flowers you would like to preserve and trim the stem to one inch.
Fill your airtight container with one inch of silica.
Lay your blooms on top of the silica and gently pour additional silica on top until flowers are covered.
Close the lid and let flowers sit for one week.
Open the container and gently uncover the blooms and use a soft bristle paintbrush to dust off excess silica.
For maximum preservation, spray your flowers with hairspray to seal out moisture.
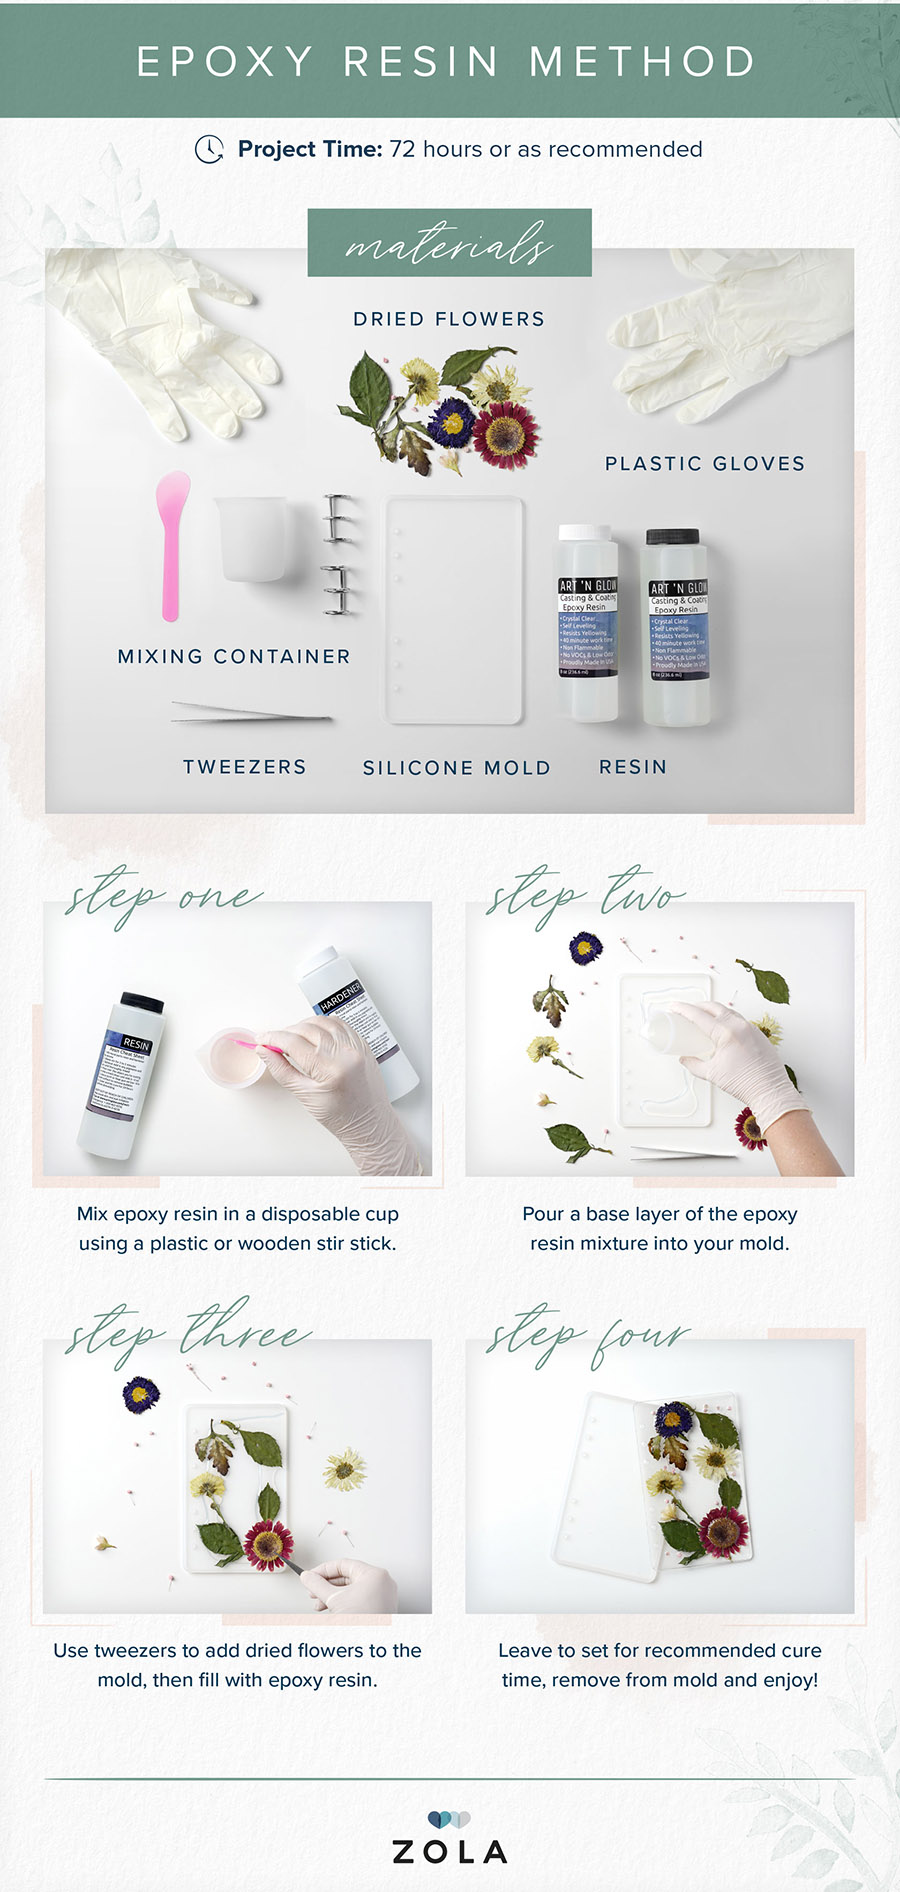
Epoxy Resin Method
Preserving flowers in epoxy resin is one of the most beautiful ways to memorialize your special day. There are so many ways that you can use resin to preserve your blooms. From photo album covers, tabletops, to earrings, the sky’s the limit. Before you get started on this resin method, make sure your blooms are dried first by using the silica gel method or another method of drying.
Epoxy Resin Method Video
 Credit zola.com
Materials needed:
Dried flowers
Epoxy resin
Gloves
Plastic, glass, or ceramic mixing cup
Popsicle stick
Tweezers
Desired mold
Instructions:
Mix the epoxy in a plastic, glass, or ceramic mixing cup and stir thoroughly to ensure all air bubbles are worked out.
Pour enough resin into your mold to cover the bottom.
Arrange your dried flowers with tweezers in your desired pattern.
Pour the rest of the epoxy in the mold until full.
Use the recommended wait time that the epoxy package provides.
Remove the dried resin from the mold and accessorize as you please.
Wedding planning is so much more than preparing for an event. This time is filled with unforgettable moments like writing vows, planning your guest lists and styling touches, getting crafty with signage and bunting, finding your outfits, and then eventually celebrating on the big day. Preserving your wedding bouquet is a lovely way to save a piece of the magic of your best day ever!


0 Comments